
From Google to GrapheneOS: A Practical Guide
Switch your mobile phone from invasive Google to privacy-protecting, security-enhanced GrapheneOS. It’s easier than you think.
This guide documents the author’s installation of GrapheneOS on a Google Pixel 10. GrapheneOS changes quickly — verify specifics against the official documentation before relying on them.
Start with the threat model
Decide what you are defending against before changing anything.
The goal here is to minimise commercial tracking and data collection by Google, Meta and the wider advertising industry. It is not to defeat a state actor. Protecting against that level of surveillance requires substantially more discipline — separate hardware, no personal accounts, careful network hygiene. Many of the same measures apply in both cases, but the effort and inconvenience scale sharply.
Two secondary goals follow from the first: prefer open-source applications, and eliminate dependence on Google Play Services.
Consider your own situation and the specific risks you want to mitigate. That decision determines which of the steps below are worth the trouble.
Choosing hardware
GrapheneOS currently supports Google Pixel phones only — which sounds contradictory for a de-Googling project. The reason is hardware: Pixels provide a verified boot chain with downgrade protection, a proper secure element, and a long guaranteed firmware-update window. Few other manufacturers meet those requirements. See the GrapheneOS FAQ for the full rationale.
This is beginning to change. On 2 March 2026, at Mobile World Congress, Motorola announced a long-term partnership with the GrapheneOS Foundation covering future devices engineered for GrapheneOS support. No model or release date has been confirmed, and GrapheneOS has stated that existing Motorola hardware — including 2026 models — does not meet its standards. Pixel remains the only practical option today.
Within the Pixel line, the Pro models offer better cameras, particularly for video. If video quality doesn’t matter to you, the standard model is fine and cheaper. Currently devices from Pixel 6 to Pixel 10 are supported.
Buying advice
It’s tempting to buy an older Pixel, and since you’re going to be installing a new operating system, that’s a viable alternative. However, be careful. Online phone retailers engage in shady practices. If at all possible, check the IMEI before purchase. Operators report lost and stolen handsets to the GSMA Device Registry, which maintains a shared block list so that a device denied service on one network is denied on others. Participation is voluntary and coverage is uneven between countries. But in Europe and North America a blacklisted phone cannot make calls or use mobile data. Free lookup tools are widely available; in the US, the carrier-backed Stolen Phone Checker is authoritative. You may also try IMEI.info, or others. And you may be able to get an answer from your mobile service operator.
This advice is not theoretical. Online supplier Rakuten / Elite Mobi sold me a stolen or counterfeit device — and provided an insulting resolution process requiring more than twenty submitted files, endless forms, and headaches. A second, new unit ordered from GoMobi was paid for and then cancelled by the seller without explanation within 24 hours. The refunds arrived eventually, but it was an infuriating experience. I recommend avoiding both of those retailers. Buying used or reconditioned may save money but cost time and frustration.
Installation
There are two supported methods:
- Web installer — recommended for most users. Runs in the browser via WebUSB.
- Command-line installer — for users who prefer not to trust the project’s web infrastructure, and who are comfortable with
fastboot.
The web installer requires a browser with WebUSB support. Officially supported: Chromium (except Ubuntu’s Snap build, which ships broken WebUSB), Chrome, Edge, Vanadium, and Brave with Shields disabled. Firefox will not work — it does not implement WebUSB, and Mozilla continues to oppose doing so. Avoid Flatpak and Snap browser packages, which cause connection failures. You’ll need a computer with 2 GB free memory and 32 GB free storage. The images themselves are only ~1.5 GB, but Chromium-based browsers grant a web page a storage quota proportional to the free space on the volume holding the browser profile — so a large amount of free space is required for the browser to permit the installer to use the few gigabytes it actually needs.
You cannot avoid connecting to the internet
The original plan was to install without ever letting the phone reach the network, avoiding the initial handshake in which a new device reports its IMEI, MAC address and network location to Google.
That isn’t possible. Unlocking the bootloader requires the stock OS to check whether the device was sold carrier-locked. From the GrapheneOS documentation:
On device model variants (SKUs) which support being sold as locked devices by carriers, enabling OEM unlocking requires internet access so that the stock OS can check if the device was sold as locked by a carrier.
So the phone contacts Google once, unavoidably, before you can install anything. Connecting through a VPN limits what the network path reveals, but the device identifiers are still transmitted. Accept it and move on: everything after this point is clean.
Note also that the retailer already knows who bought which IMEI. An adversary able to compel that record could link the handset to you — but that is a legal-process threat, outside the model set out above.
The installation itself is quick and largely automated. Follow the official instructions; they are accurate and don’t need restating here. Allow about fifteen minutes.
Re-lock the bootloader
After installation completes, re-lock the bootloader and disable OEM unlocking in Developer options. This restores verified boot and is not optional — an unlocked bootloader undoes much of what you just gained.
You can verify the integrity of the image you installed by comparing the yellow notice on boot with the official sha256 checksum for the image on the GrapheneOS site.
Set up authentication first
This is the first decision the OS asks you to make, and it deserves more than a moment’s thought.
Use a PIN of six digits or more, or a passphrase. The secure element applies aggressive throttling to failed attempts, which is what makes a randomly chosen six-digit PIN genuinely strong — a memorable one is considerably weaker. GrapheneOS supports passwords up to 128 characters if you prefer diceware.
Fingerprint unlock is convenient and has a specific weakness: someone can physically place your finger on the sensor. In situations where that is plausible — border crossings, for instance — reboot the phone beforehand. A rebooted, never-unlocked device is in Before First Unlock state, where the data is encrypted at rest and biometrics won’t work at all.
Then review these GrapheneOS-specific controls under Settings → Security & privacy (see the features page):
| Feature | What it does |
|---|---|
| Auto-reboot | Reboots the device if it isn’t unlocked within a set period, returning it to Before First Unlock. Defaults to 18 hours; configurable from 10 minutes to 72 hours. |
| USB-C port control | Restricts the data port. "Charging-only when locked" is the default; it can be disabled entirely. |
| Duress PIN/password | Entering it at any credential prompt irreversibly wipes the device, including installed eSIMs. |
| PIN scrambling | Randomises the keypad layout to defeat shoulder-surfing and smudge analysis. |
A shorter auto-reboot interval is the single highest-value change most users can make.
What ships with the OS
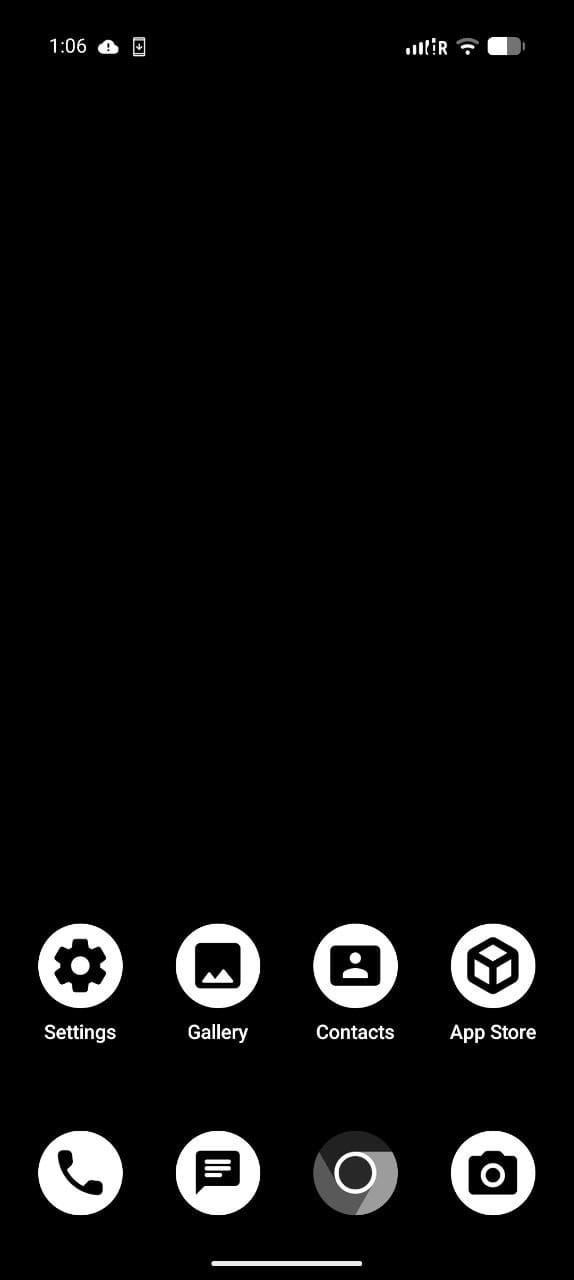
The install is deliberately spare. Pre-installed: Apps (the GrapheneOS repository), Auditor, Calculator, Camera, Clock, Contacts, Files, Gallery, Info, Messaging, PDF Viewer, Phone, Settings, and Vanadium (a hardened Chromium, and the recommended default browser).
There is no app store in the conventional sense and no Google account prompt. You are starting from a blank slate.
User profiles and compartmentalization
GrapheneOS supports multiple full user profiles, each with its own apps, data and encryption. A profile you aren’t using is at rest and inaccessible. Switching between them takes a couple of taps from the quick settings panel, and you can end a secondary profile’s session to return it to Before First Unlock without rebooting the phone.
The standard pattern is a restrictive owner profile for everything that behaves, plus a secondary profile containing sandboxed Google Play for anything that insists on it. Apps in one profile cannot see apps in another — Google Play in a secondary profile has no visibility into your owner profile at all.
Worth noting: that secondary profile has so far proved unnecessary. One was created, but nothing has yet forced its use — including a banking app, which runs without Play Services. Set the structure up if you like, but don’t assume you’ll need it.
Installing apps
Before installing anything, ask whether you need an app at all. A service’s website, opened in Vanadium, often works fine and adds no code to your device. Fewer apps means less attack surface and fewer permissions to audit.
The approach used here: eliminate known privacy offenders; replace them with alternatives where possible; and only if strictly necessary, run them sandboxed in a separate profile.
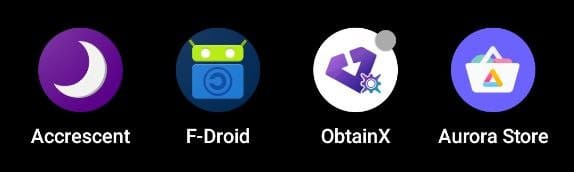
Four installers cover nearly everything. Work down the list — start with the strongest trust model and fall back only as needed.
Accrescent
Install from the pre-installed Apps. A curated repository of reproducible, developer-signed builds — the apps are signed by whoever wrote them, not rebuilt by an intermediary. Strongest trust model of the four, smallest catalogue. Auto-updates. accrescent.app
F-Droid
Install the APK from f-droid.org. Large, long-established FOSS catalogue, mostly rebuilt from source by F-Droid itself, with useful "Anti-Features" labelling that flags things like dependence on non-free network services. Auto-updates.
ObtainX
Install from F-Droid. Tracks apps at their original upstream source — GitHub, GitLab, the project’s own site — and updates from there, so you aren’t waiting on a repository maintainer. Auto-updates. F-Droid listing
ObtainX is a fork of Obtainium, and the difference is what performs the install. Obtainium installs APKs itself through the standard Android package installer. ObtainX downloads the APK and hands it to whichever installer you configure — the developer’s stated reason for forking, since some hardened install policies block the standard sideload path. It also offers optional VirusTotal scanning and bulk-import of already-installed apps.
Aurora Store
Install from F-Droid. A pseudonymous front-end to Google Play — useful for apps distributed nowhere else, though you are still pulling the binary through Google’s pipe. auroraoss.com
You can also install an APK directly from a site you trust. Avoid third-party APK aggregators entirely — there is no way to verify they haven’t modified the binary. Direct APKs also generally won’t update themselves, so prefer a managed installer where one exists.
One practical trap: an app’s signature is tied to where you got it. If you installed something from F-Droid, track it via its F-Droid source, not its GitHub releases. The package name matches but the signing key doesn’t, and Android will refuse the update.
This is more work than a single Play Store. That is the point, and the effort is itself informative: it demonstrates how deeply Google distribution is embedded in ordinary Android use.
Filling the gaps
Swipe typing. I find it very useful, but it’s not available out of the box. Install HeliBoard (F-Droid package helium314.keyboard), then add the gesture library, which is closed-source and therefore unbundled:
- HeliBoard → Settings → Advanced → Load gesture typing library. The dialog reports your CPU architecture —
arm64-v8aon any current Pixel. - Download
libjni_latinimegoogle.sofor that architecture from the OpenBoardjniLibsdirectory. - Return to that setting and select the downloaded file.
- Configure behaviour under Settings → Gesture typing, which now appears.
HeliBoard functions with network access denied — worth doing for a keyboard, given that everything you type passes through it.
File transfer. LocalSend (F-Droid) moves files between phone and desktop over the local network. It’s LAN-only — Wi-Fi or Ethernet, not USB. For USB transfers, use MTP by changing the USB preference when the cable is connected.
Maps. Organic Maps provides offline maps and turn-by-turn routing without transmitting location history.
Utilities. Amaze File Manager (F-Droid) for file operations. Trail Sense bundles offline maps, compass, weather, QR scanning and diagnostics. Exodus Privacy analyses installed apps for embedded trackers and permissions — some trackers are innocuous, but knowing which apps report what is the point.
A known annoyance: Vanadium home-screen shortcuts disappear. This is a longstanding bug. An alternative launcher (Lawnchair) helps some users; no browser fixes it. Keep Vanadium as the primary browser regardless — it’s the most hardened option available — and add Brave only if you specifically want its content blocking.
Messaging
Signal, via Molly. Molly is an independent Signal fork, compatible with Signal’s servers and other users. The Molly-FOSS build contains no proprietary blobs; it adds passphrase encryption of the message database, RAM shredding when locked, automatic locking after inactivity, Tor/SOCKS proxy support via Orbot, and UnifiedPush capability. Install from Accrescent.
Telegram. Only "Secret Chats" are end-to-end encrypted — regular chats, groups and channels are encrypted in transit but stored on Telegram’s servers, where the company can technically access them. Since 2024, Telegram will disclose phone numbers and IP addresses to law enforcement on a valid court order where a user is a criminal suspect, not just in terrorism cases; metadata including IP addresses may be retained for up to twelve months. A phone number is mandatory at signup. If you use it, install the APK from telegram.org (or track it in ObtainX), then set Who can see my phone number to Nobody, restrict Who can find me by my number, decline contact syncing, enable two-step verification, and disable peer-to-peer for calls so your IP isn’t exposed to the other party. It works without Play Services. Treat it as a convenience tool, not a private one.
WhatsApp — and why it isn’t installed here
WhatsApp encrypts message content end-to-end using the Signal Protocol, and that is genuinely not the problem. The problem is that Meta still collects who you contact, when, how often, in what groups, from which IP address, in some cases where, on what hardware, and how long you spend online — a social graph of considerable resolution, gathered continuously, from which the content of any individual message is largely redundant. Your phone number is the account identifier, which makes it a durable key for linking your WhatsApp activity to your Facebook and Instagram accounts and to Meta’s advertising profile of you. On installation the app asks to upload your address book, which hands Meta the names and numbers of everyone you know — including people who have never used the service and cannot consent to being catalogued. The client is proprietary, so none of this can be independently audited. And the app expects Google Play Services for push notifications, meaning it reintroduces the dependency this whole exercise was intended to remove.
The deeper issue is that you cannot fix any of this unilaterally. Chat backups are end-to-end encrypted only if both parties enable it; if the person you’re talking to backs up to their cloud storage unencrypted, your conversation is readable there no matter how carefully you configured your own device. Your privacy on WhatsApp is capped by the least careful person in the thread.
Installing WhatsApp on a hardened phone doesn’t protect the WhatsApp data. It protects everything else on the device. If the account already exists elsewhere, the new phone changes nothing about what Meta knows — only a new number would. Decide whether the account is worth keeping; the handset it runs on is a secondary question.
Push notifications
Most Android apps use Firebase Cloud Messaging, which routes every push event through Google’s servers via Play Services. GrapheneOS doesn’t ship Play Services, so an app that only speaks FCM gets no push notifications at all.
In practice:
- Molly and Telegram both include their own fallback, holding a persistent connection to their own servers. This works without Google and costs some battery. Allow them to run unrestricted in the background.
- Proton Mail relies on Firebase and has no shipping alternative, so mail doesn’t arrive unprompted. In practice this means tapping refresh — a minor inconvenience.
- Thunderbird never used push on any platform; it polls IMAP on a schedule.
UnifiedPush is the open alternative: a single distributor app on your device (commonly ntfy) holds one connection, and UnifiedPush-aware apps register through it. It only works with apps built for it — which covers Molly (via a MollySocket bridge), Element and other Matrix clients, but not Proton Mail.
This setup does not use UnifiedPush. Molly’s built-in WebSocket connection has been adequate, and adding a bridge introduces another component to maintain. If battery life becomes a problem, UnifiedPush plus MollySocket is the documented fix.
VPN and the Proton suite
Any reputable VPN works. Proton was already in use here, with matching desktop applications that make moving between phone and computer straightforward — which amounts to a decision to trust one provider across several services:
- VPN
- Drive (1 TB)
- Pass (password manager, which also generates TOTP codes for two-factor authentication)
- Calendar — note: no CalDAV support
- Lumo (private AI chat; a better security profile than OpenAI or Anthropic for quick queries)
- Meet (video conferencing; fewer features than Zoom, which is itself a privacy concern, but serviceable)
- Wallet (cryptocurrency; untested here)
A free tier exists and may be sufficient, depending on your needs. Consolidating on one vendor is a trade-off — convenience and integration against a single point of trust. If you’d rather not, alternatives exist for each component; Mullvad is the most frequently recommended VPN substitute.
Sandboxed Google Play, if you need it
GrapheneOS can run Google Play Services as ordinary, sandboxed applications with no special privileges and no system-level access. Install from the Apps app, preferably in a secondary profile.
One point that is widely misunderstood: you do not need a Google account to install or initialise sandboxed Play Services. Install Play Store, Google Services Framework and Play Services, open the Play Store once to trigger initialisation, and the Play Services APIs — push, attestation, location — become available to apps in that profile. Signing in is optional.
An account is only required to install or purchase apps from the Play Store itself. So if you need Play Services for compatibility, you need no account at all. If you need the store, you need one.
Using your existing account re-links the device to your Google identity. If you want a separate one, create it from a network unconnected to you — public Wi-Fi, fresh incognito session — on a profile that has never touched your real accounts, and set up TOTP two-factor immediately so a phone number is never requested. Google increasingly demands one regardless, at which point the practical workarounds involve paid SMS-rental services and are beyond the scope of this guide.
Backups
Google makes backing up stock Android effortless. GrapheneOS does not. But before reaching for a tool, establish what would actually be lost, because for a cloud-centric app selection the answer is less than you’d expect.
Data | Needs a local backup? |
|---|---|
Proton Mail, Drive, Pass, Calendar | No — server-side and synced across devices. |
Telegram | No. Cloud chats live on Telegram’s servers and repopulate on reinstall. Secret Chats are device-only and unrecoverable. |
Signal / Molly | No — see below. |
Photos and files | Only if not already syncing to cloud storage. |
App list, settings, home screen | Yes. This is the real target. |
Enable Signal’s backup in Molly. Signal was designed so message history lives only on your devices — historically, losing the phone meant losing the archive. Signal now offers opt-in end-to-end encrypted backups, available in Molly, protected by a recovery key that Signal never sees. It is off until you turn it on, and the key is unrecoverable if lost. Enable it and store the key offline.
Seedvault
The built-in tool is Seedvault, at Settings → System → Backup. It encrypts data on the device before it leaves, using a 12-word recovery key — record this offline, because without it the backup is so much noise. You choose where it goes.
Know the limits before relying on it:
- It backs up apps, some app data, and some system settings — not a device image.
- Apps that bind their encryption keys to the secure element cannot be captured by any generic backup tool. Signal and Molly are the notable cases: the key can’t leave the hardware, so the encrypted database is meaningless on a different install. Seedvault may report success while the restored data is unusable. This is why Molly needs its own backup enabled.
- Apps not used recently are skipped. Open them briefly first.
- Backups are per-profile.
- Parts of this are still labelled experimental.
Where to put it
Seedvault will write to a USB drive plugged into the phone, or to a WebDAV server over the network. WebDAV is an old, boring extension to HTTP that lets a client read and write files on a remote server as though it were a folder.
The USB option needs no configuration at all and keeps everything in your hands. Its only real drawback is that it happens exactly as often as you remember to do it.
If you happen to have a local NAS that supports WebDAV, then that would probably be the best choice.
Running a WebDAV server on your own machine sounds like the obvious middle path, but it’s more complicated than you might imagine. GrapheneOS refuses cleartext connections, so the server must present a genuine TLS certificate — and a computer on your home network has no public hostname to issue one for. Working around that means either a private mesh network like Tailscale or a reverse proxy on a domain you control, and on the way you will discover that Android permits only one active VPN at a time, so your commercial VPN and your mesh network cannot be simultaneously connected. This is all solvable, but none of it is worth doing unless you enjoy that sort of thing. If you want your backups to stay in the building, use the USB drive or local NAS.
The practical answer: a hosted WebDAV provider
Most mainstream consumer clouds — Google Drive, Dropbox, iCloud, Proton Drive — offer no WebDAV interface. Several smaller providers do, including Nextcloud and ownCloud instances, pCloud, Infomaniak kDrive and Hetzner Storage Boxes.
Koofr is what ended up in use here, and it’s what I’d recommend. It offers 10 GB free with official WebDAV support, paid tiers are inexpensive if you outgrow that, and the company is based in Slovenia — so the service sits inside the EU and under the GDPR. That matters less than it might, since Seedvault encrypts everything on the phone before it leaves and the provider only ever holds ciphertext, but a jurisdiction with real data-protection law is a reasonable second line.
Setup is quick and easy:
- Create the account and, in Koofr’s web settings, generate an app-specific WebDAV password. Don’t reuse your login password.
- On the phone, go to Settings → System → Backup → WebDAV and enter the URL, your username, and that app password.
- Point at a subdirectory rather than the account root — something like
https://app.koofr.net/dav/Koofr/GrapheneBackups. Seedvault creates a hidden.SeedVaultAndroidBackupfolder inside it. - Enable both Backup my apps and set a schedule. Optionally, enable Backup my files, although that may not be necessary if your photos and files are backed up some other way.
- Run Backup Now from the three-dot menu, then check the Koofr web interface directly to confirm the files arrived. Don’t take the app’s word for it.
- The Check Integrity buttons stay greyed out until indexing finishes. Once they’re live, use them.
After that it runs on its own. Photos can sync continuously to cloud storage separately, leaving Seedvault to do the thing it’s actually good at: preserving the app-and-configuration set you spent an afternoon assembling.
Final Steps
Restoring. Backups run, the files are confirmed present on the server, and integrity checks pass — but recovery has not been exercised, and an untested backup is a hypothesis rather than a safeguard.
You can test restoring by creating a new profile and restoring into it.
Where this leaves things
The device works. Calls, messaging, banking, maps, mail and navigation all function without Google Play Services — which was the surprise, and the whole point in trying this. Assembling the app-installation stack takes an afternoon. Backups need a deliberate strategy rather than a single switch, and are the one area where Google’s convenience is genuinely missed.
The most useful thing the process teaches is how thoroughly Google distribution and messaging infrastructure is woven into ordinary Android, and how much of it turns out to be optional.
AI tools were used to organise and edit this guide; the experience, choices and conclusions are the author’s. If you find any errors, please let me know. The GrapheneOS build number was 2026081301.